How do I enable the "Find My iPad" feature?
Answer
“Find My iPad” allows you to track down your iPad if it’s ever lost or stolen. If the machine is powered on and connected to the internet, you can locate it by visiting https://www.icloud.com/#find on a computer or by using the Find My iPhone or Find My iPad apps on an iPhone or iPad, respectively. From there you can send an alert message to the device, put a device in Lost Mode, or erase it remotely. Read on for instructions on enabling this helpful feature of iOS.
Table of Contents
1. Enabling Find My iPad
To enable the feature, all you need is to be signed into iCloud on your iPad, and have location services turned on. If you don’t have an Apple ID, or if you’re unsure of whether you have one, skip ahead to section 2. If you know you have an Apple ID floating around somewhere, skip ahead to section 2.a for instructions on recovering your lost Apple ID.
- Make sure your iPad is turned on and unlocked. Find and launch the Settings app on your homescreen. (See Figure 1)

Figure 1: Settings App
- Navigate to the iCloud Settings panel. (See Figure 2)
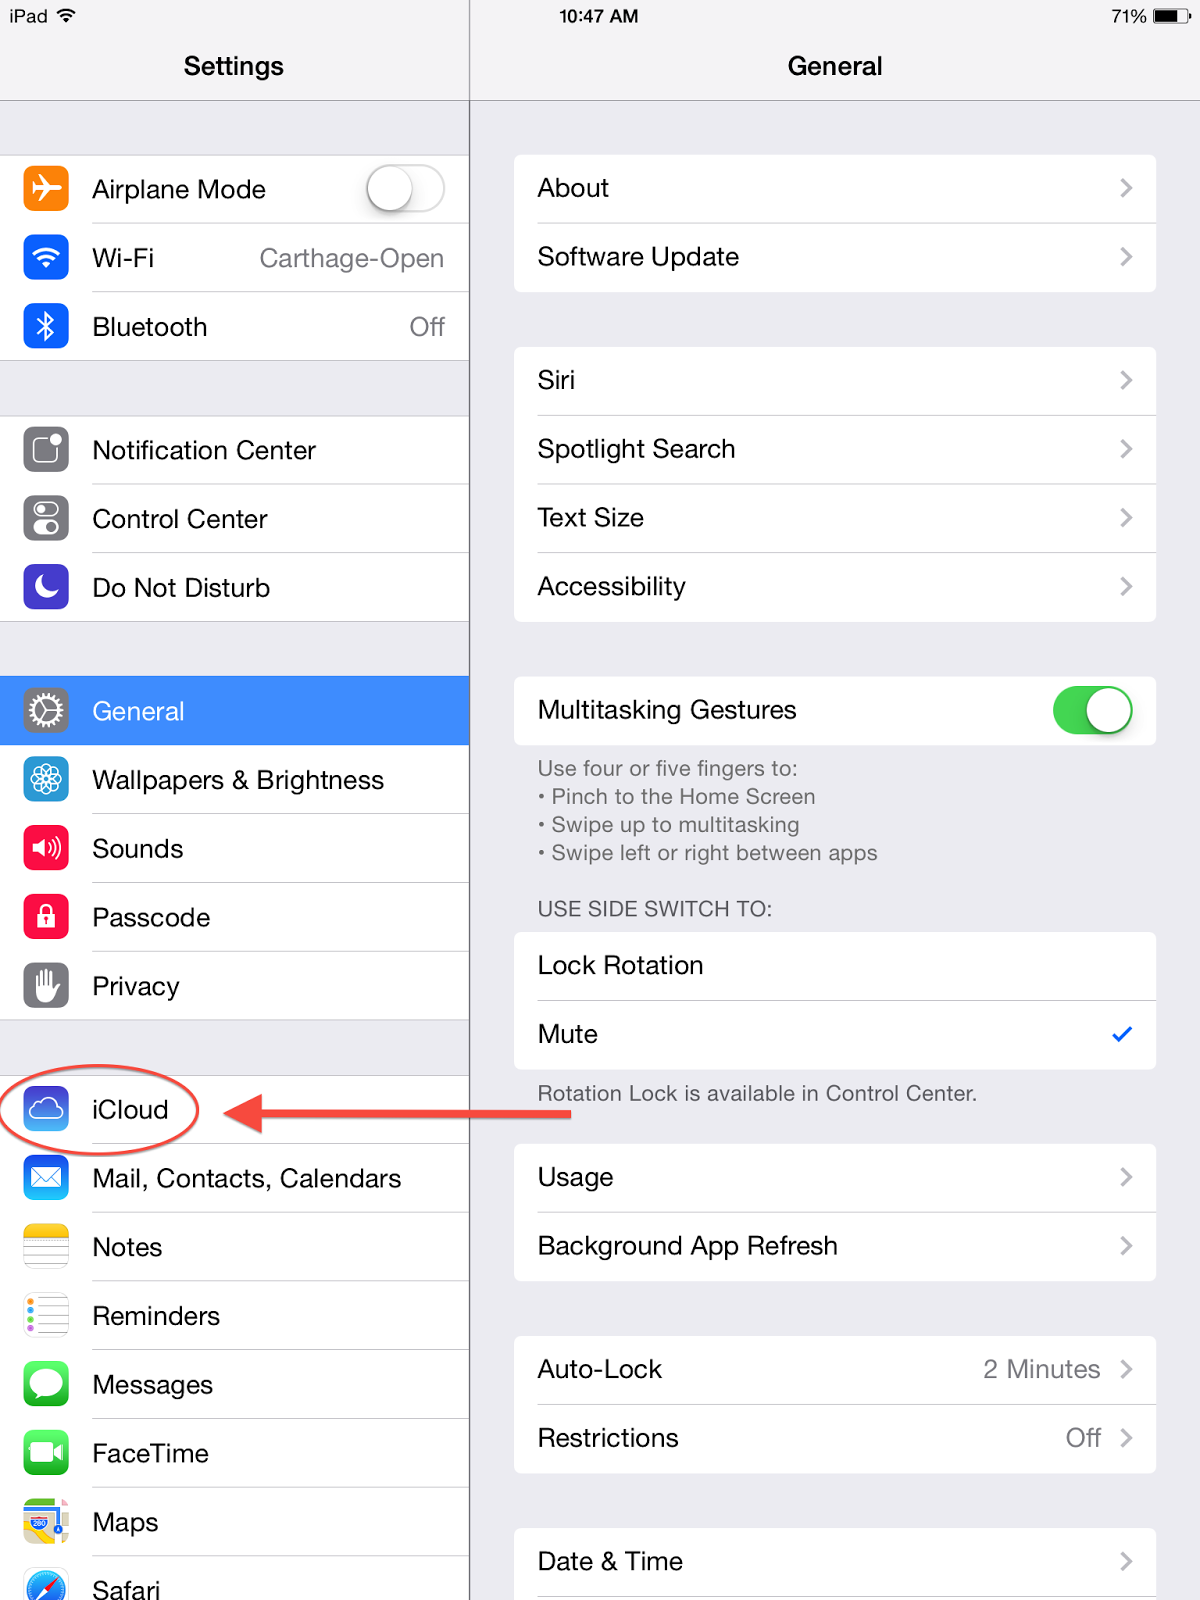
Figure 2: iCloud
- Toggle the “Find My iPad” feature on. You’re done! (See Figure 3)
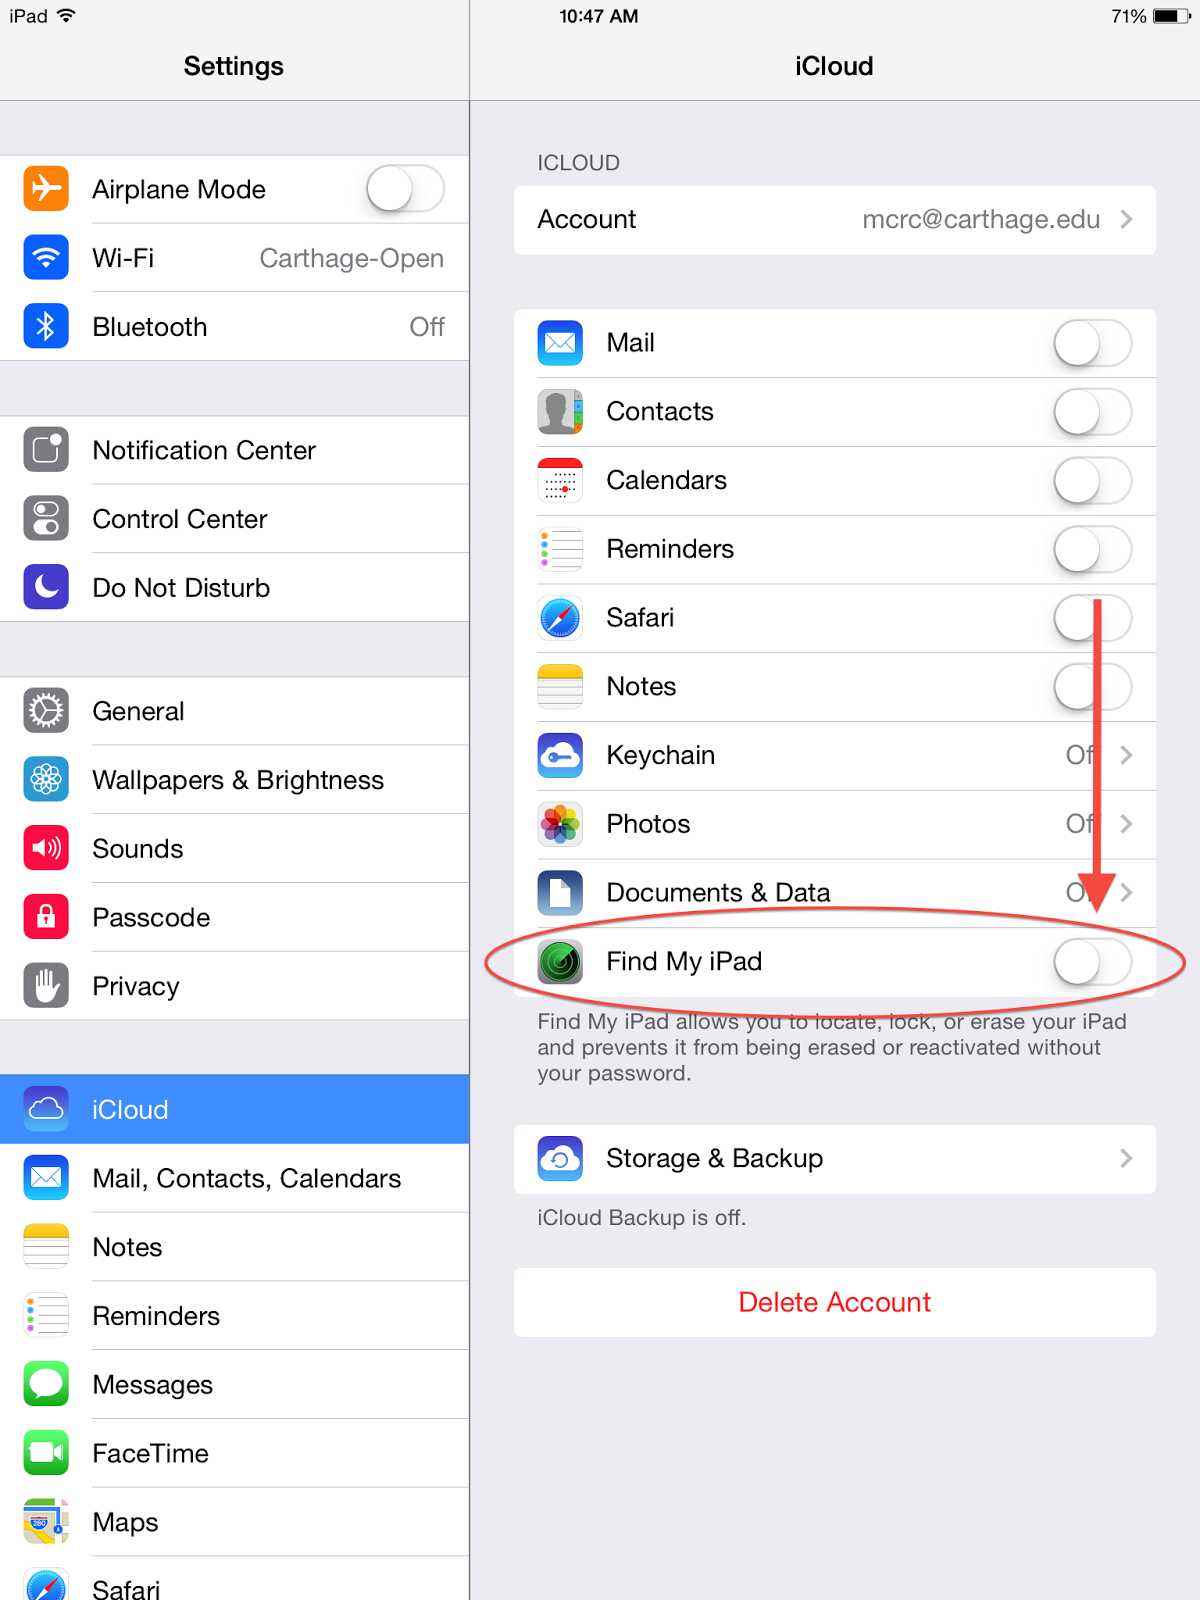
Figure 3: You’re set!
1.1 Enabling Location Services
If you were able to turn on Find My iPad, but received a warning that location services were turned off (Figure 4), then you will need to enable location services before your Mac can be located on a map in case it’s lost or stolen.

Figure 4: “But wait! There’s more...”
- You’ll be taken out of the iCloud preferences pane and into the “Privacy” preferences pane. Tap on “Location Services” to open up those settings. (See Figure 5)

Figure 5: You can’t alter the preferences until you unlock this panel
- Toggle the Location Services switch to the on position. (Figure 6)

Figure 6: Toggle the switch on
- Next, we need to make sure that Location Services are turned on for Find My iPad. Click on the Find My iPad item to open its settings. (Figure 7)

Figure 7: Check to be sure...
- Make sure that the Find My iPad switch is toggled on. (Figure 8) If it is, you’re done!

Figure 8: You’re done!
2. Create an Apple ID (or recover a lost one)
If you have ever downloaded music, movies, books, or apps from iTunes, then you already have an Apple ID. If you would like to use your pre-existing Apple ID, but can’t remember your password, see subsection 2.a: Recovering a lost Apple ID password.
- Launch the Settings app, navigate to the iCloud pane, and tap “Get a Free Apple ID”. (Figure 9)

Figure 9: Just a few easy steps away from an Apple ID
- You will prompted to enter your birthday, first and last name, and an e-mail address. If the iPad you are using is owned by the college, we STRONGLY encourage you to use your Carthage e-mail address. You will then be asked to create and verify a password. Note that the password criteria are spelled out beneath the password boxes! Carthage has different password requirements, so it might not be possible for your two passwords to be the same.
- Use your newly created Apple ID and password to log into iCloud on your iPad. You will receive an e-mail from Apple informing you that iCloud was used to log into a device.
- You’re almost done! Hop back up to section 1 to finish setting up Find My iPad.
2.a Recovering a lost Apple ID password
Already have an Apple ID, but forgot the password? Not a problem. Use Apple’s iForgot service.
- Launch the Settings app and navigate to the iCloud pane.
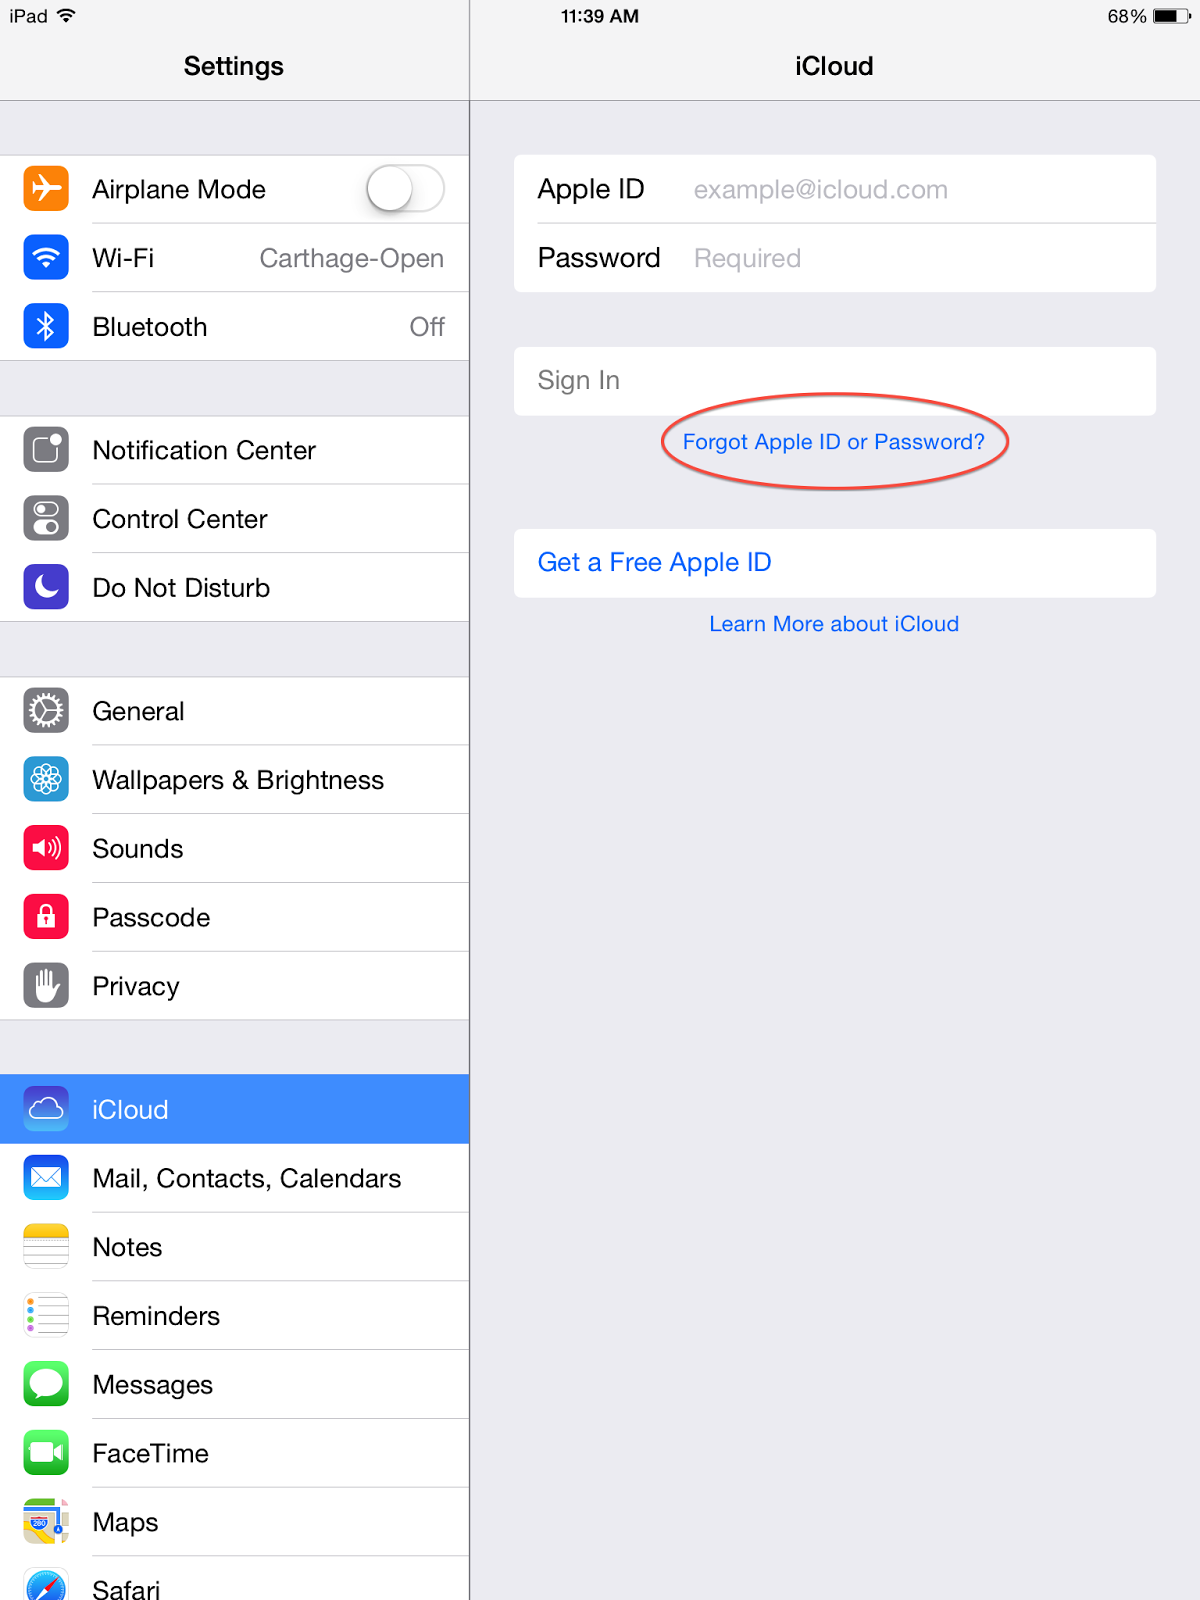
Figure 10: If you made it to this section, then you must have forgotten
- A window will pop up asking for your Apple ID e-mail address. Fill it in and proceed. (Figure 11)

Figure 11: Your Apple ID is an e-mail address
- You’re provided with the option to send a password reset link to the Apple ID e-mail address, or to answer security questions. Unless you remember the answers to your security questions, select Reset By Email and click next. (Figure 12)

Figure 12: Two methods of authentication
- You’ll get a confirmation that an e-mail has been sent. The e-mail usually arrives pretty quickly (under a minute). If it takes longer than 5 minutes for you to receive the e-mail, you should check your e-mail’s spam filter. The password reset e-mail is only sent to the e-mail associated with your Apple ID. If that Apple ID is not your Carthage e-mail address, you will need to log into the e-mail address that is associated with your Apple ID. Follow the instructions provided in the e-mail.
3. Resources and References
iCloud- Find My iPhone, iPad, or Mac http://www.apple.com/support/icloud/find-my-device/
Find My iPhone overview: http://support.apple.com/kb/PH2696
Set up Find My iPhone: http://support.apple.com/kb/PH2697
iCloud: Locate your device: http://support.apple.com/kb/PH2698
iCloud: Use Lost Mode: http://support.apple.com/kb/PH2700