How do I enable the "Find My Mac" feature in OS X?
Answer
“Find My Mac” allows you to track down your MacBook Pro if it’s ever lost or stolen. If the machine is powered on and connected to the internet, you can locate it by visiting https://www.icloud.com/#find on a computer or by using the Find My iPhone or Find My iPad apps on an iPhone or iPad, respectively. From there you can send an alert message to the device, put a device in Lost Mode, or erase it remotely. Read on for instructions on enabling this helpful feature of Mac OS X.
Table of Contents
- Does your Mac support “Find My Mac”?
- Create an Apple ID (or recover a lost one)
- Enabling Find My Mac
- There’s No iCloud Pane in System Preferences!
- Resources and References
Does your Mac support “Find My Mac”?
Find My Mac is part of iCloud, which wasn’t included in Mac OS until OS X 10.7 Lion, which debuted in July 2011. If you’re still running Snow Leopard (OS X 10.6), then you’ll need to upgrade your operating system in order to take advantage of this feature. If you’re thinking about upgrading your operating system, shoot me an e-mail at rlahue@carthage.edu and we can set up an appointment to see if it’s right for you and your software setup.
Create an Apple ID (or recover a lost one)
If you know that you have an Apple ID and want to use your personal Apple ID for this procedure, then skip ahead to the next section. If you have ever downloaded music, movies, books, or apps from iTunes, then you already have an Apple ID. If you would like to use your pre-existing Apple ID, but can’t remember your password, see subsection 1.a.
- Launch System Preferences (Apple logo > System Preferences...)
- Under the third row of icons labelled Internet & Wireless, click on iCloud (it should be located on the left).
- Under the Apple ID text input box, there’s a link titled “Create an Apple ID...”. Click on it. (see Figure 1)
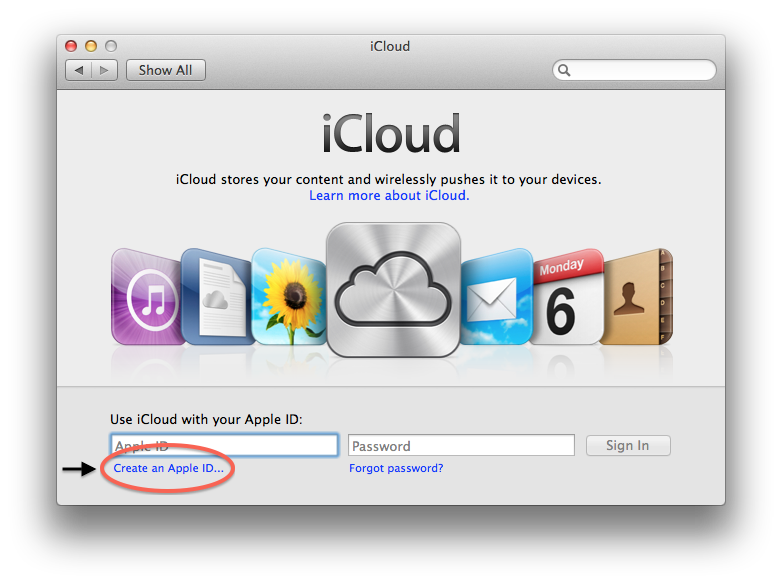
Figure 1: iCloud System Preferences panel under OS X 10.8.x
- Fill out the Location and Birthday information, then click next. (See Figure 2)
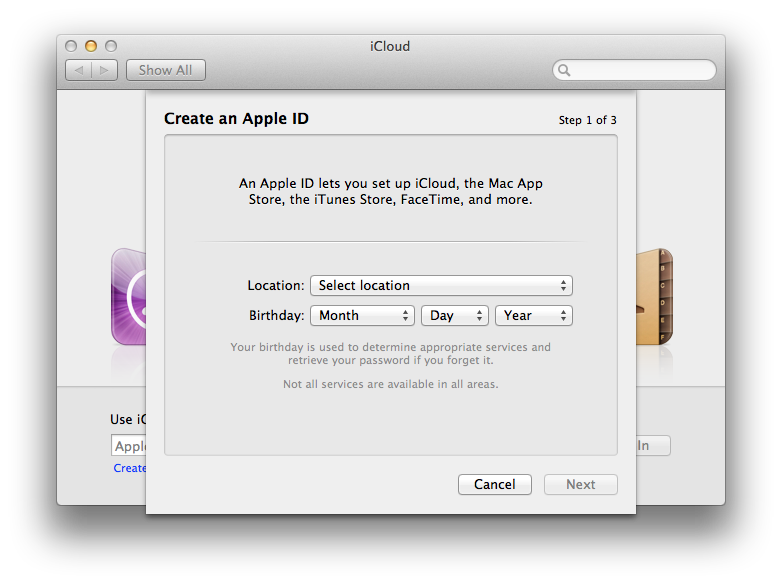
Figure 2: Location and Date of Birth
- Fill out the email, name, and password fields (see Figure 3). For your e-mail address, I suggest that you use your Carthage-provided e-mail, but feel free to use whichever e-mail address you like. Note that the password criteria are spelled out beneath the password boxes! Carthage has different password requirements, so it might not be possible for your two passwords to be the same.
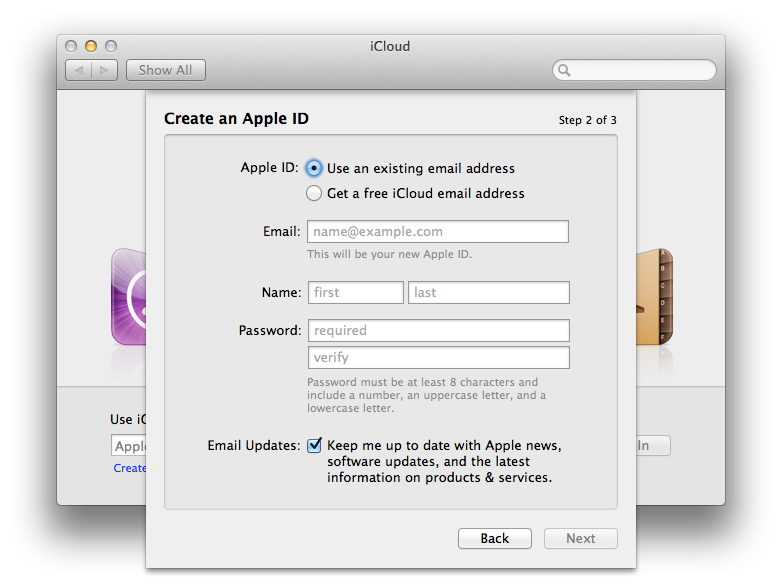
Figure 3: E-mail and Password
Recovering a lost Apple ID password
Already have an Apple ID, but forgot the password? Not a problem. Use Apple’s iForgot service.
- Launch System Preferences (Apple logo > System Preferences...)
- Under the third row of icons labelled Internet & Wireless, click on iCloud (it should be located on the left).
- Under the Apple ID password text input box, there’s a link titled “Forgot password?”. Click on it. (See Figure 4)
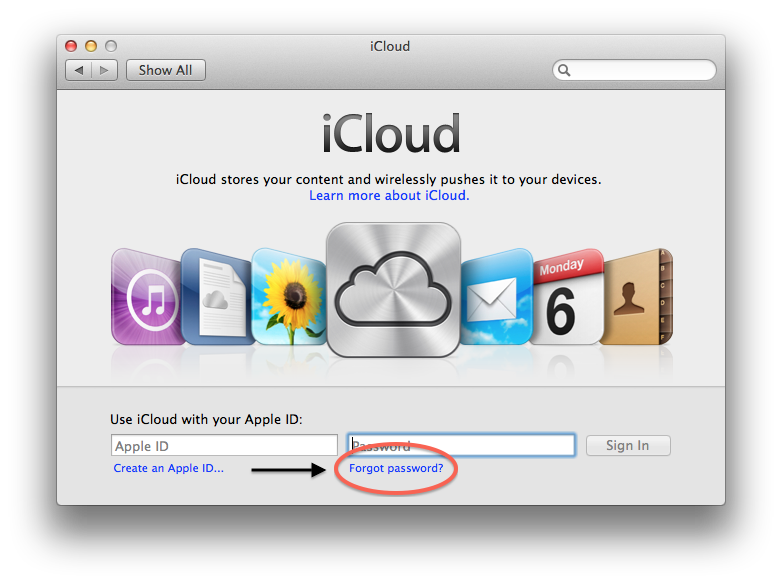
Figure 4: Forgot Password
- A browser window will open up and to https://iforgot.apple.com/ with a text box for you to enter your Apple ID. Enter your Apple ID e-mail address. Click Next. (see Figure 5)

Figure 5: Your Apple ID is an e-mail address
- You’re provided with the option to send a password reset link to the Apple ID e-mail address, or to answer security questions. Unless you remember the answers to your security questions, select Email Authentication and click next. (see Figure 6)

Figure 6: Two methods of authentication
- You’ll get a confirmation that an e-mail has been sent (Figure 7). The e-mail usually arrives pretty quickly (under a minute). If it takes longer than 5 minutes for you to receive the e-mail, you should check your e-mail’s spam filter. The password reset e-mail is only sent to the e-mail associated with your Apple ID. If that Apple ID is not your Carthage e-mail address, you will need to log into the e-mail address that is associated with your Apple ID.

Figure 7: The e-mail you receive will walk you through the next few steps
Enabling Find My Mac
To enable the feature, you have to log into your computer with your newly created (or recovered) Apple ID.
- Launch System Preferences (Apple logo > System Preferences...)
- Under the third row of icons labelled Internet & Wireless, click on iCloud (it should be located on the left).
- Fill in the Apple ID and Password fields, then click Sign In.
- You will be presented with the option to use iCloud to sync your contacts, calendars, reminders, notes, and Safari data (bookmarks, passwords, etc.), and with the option to use Find My Mac (see Figure 8). Whether or not you want to sync everything else, be sure to select Find My Mac before you click Next.
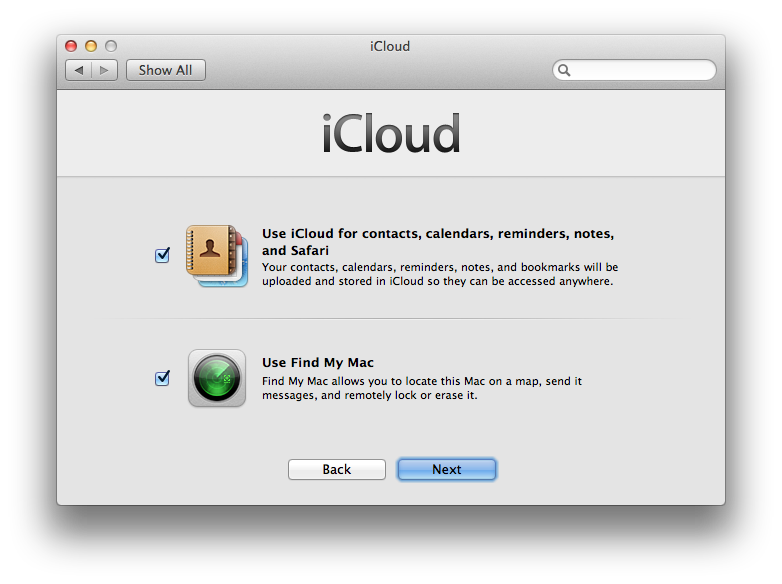
Figure 8: Check “Use FInd My Mac” before you click Next
- You will be prompted to allow Find My Mac to know your location (see Figure 9). Allow it.
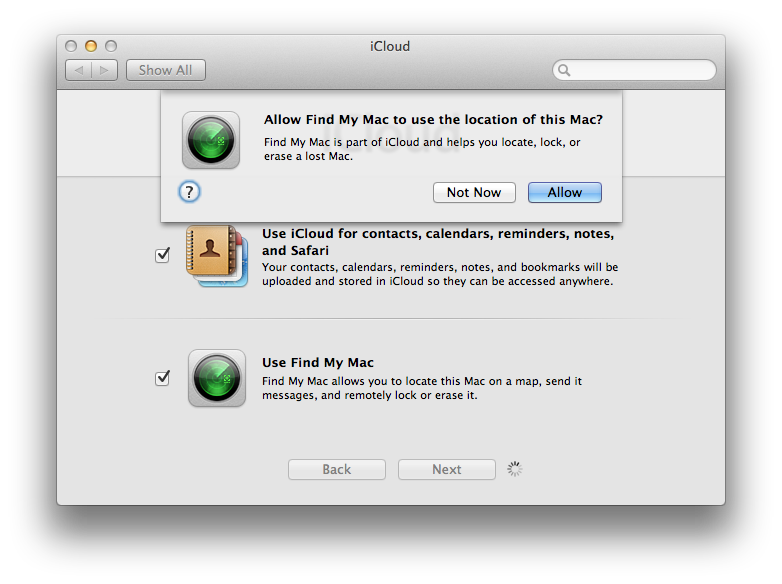
Figure 9: Allow your Mac to be located
- The iCloud control panel will load, and you should at least have Find My Mac checked off, like in Figure 10. If there’s an alert that you have location services turned off (Figure 11 below), proceed to the next section. Otherwise, you’re done!
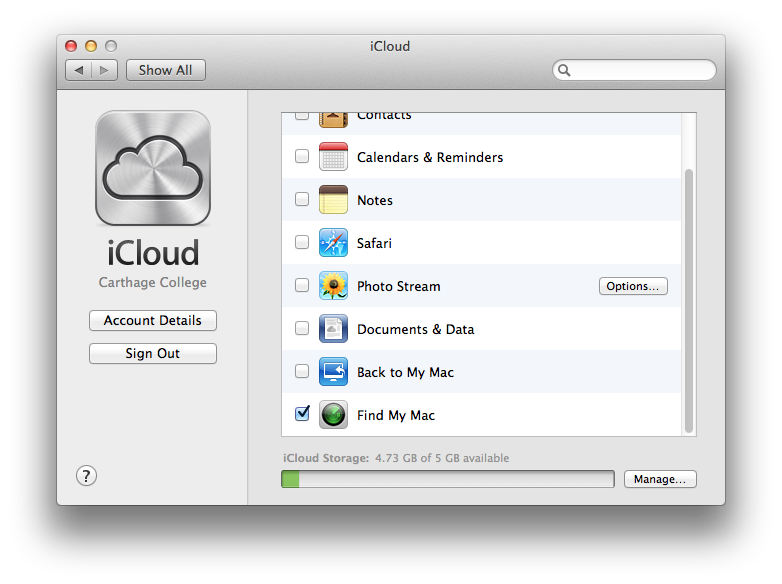
Figure 10: You don’t need to enable location services. You’re done!

Figure 11: You need to enable location services. See the next section.
Enabling Location Services
If you were able to turn on Find My Mac, but received a warning that location services were turned off, then you will need to enable location services before your Mac can be located on a map in case it’s lost or stolen.
- To the right of “Find My Mac”, there will be a button labelled “More...” (see Figure 11 above). Click the button. You’ll get a prompt asking if you want to open Security & Privacy preferences. Click “Open Security & Privacy...” (See Figure 12)
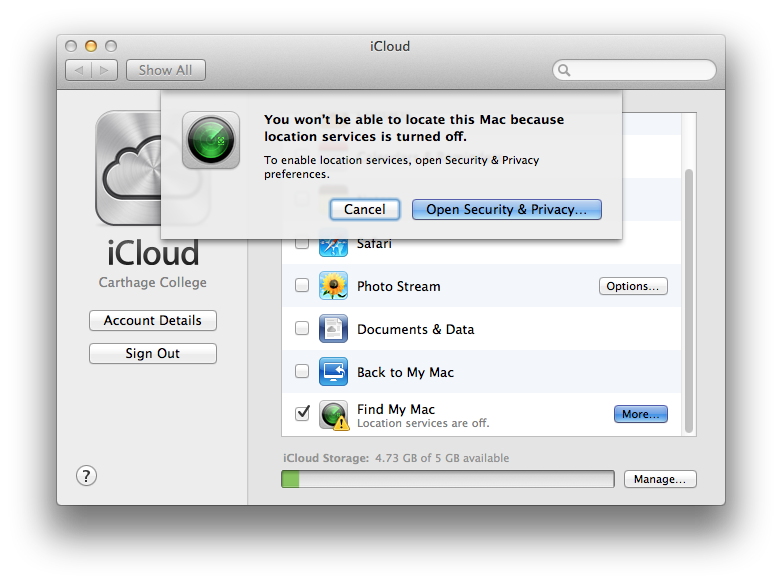
Figure 12: “But wait! There’s more..."
- You’ll be taken out of the iCloud preferences pane and into the “Privacy” tab of the Security & Privacy pane. You want to check the box next to “Enable Location Services”, but it’s grayed out. You have to unlock this preference pane first. (See Figure 13)

Figure 13: You can’t alter the preferences until you unlock this panel.
- Click the lock, enter your computer username and password when prompted, and you will be able to check the “Enable Location Services” box. (See Figure 14) Find My Mac is now fully functional. You’re done!

Figure 14: Location Services are enabled. You’re done!
There’s No iCloud Pane in System Preferences!
Find My Mac is part of iCloud, which wasn’t included in Mac OS until OS X 10.7 Lion, which debuted in July 2011. If you’re running Snow Leopard (OS X 10.6), then you’ll need to upgrade your operating system in order to take advantage of this feature.
If you’re not sure which version of the Mac OS you’re running, do the following:
- Click the Apple logo in the upper left-hand corner of your screen, and click on “About This Mac.” (See Figure 15)
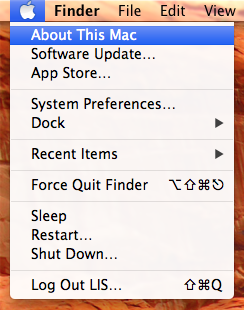
Figure 15: Apple Logo > About This Mac
- The “About This Mac” window will pop up with some basic information about your Mac (see Figure 16). The operating system version number will be just above the “Software Update...” button. If you’re running version 10.6.x, you’re running Snow Leopard, and won’t be able to use iCloud features with your Mac. If you’re running version 10.7.x, 10.8.x, or 10.9.x, you’re running a version of Mac OS that supports iCloud and Find My Mac.

Figure 16: OS X Version number. This machine is running OS X 10.8.5 Mountain Lion
Upgrading your operating system is generally a good idea, and in this case it’s only an issue if you’re running fairly old software. If you’re curious about whether or not it’s safe to upgrade your operating system, shoot me an e-mail at rlahue@carthage.edu and we can set up an appointment to see if it’s right for you and your setup.
Resources and References
iCloud- Find My iPhone, iPad, or Mac http://www.apple.com/support/icloud/find-my-device/
Find My iPhone overview: http://support.apple.com/kb/PH2696
Setup Find My iPhone: http://support.apple.com/kb/PH2697
iCloud: Locate your device: http://support.apple.com/kb/PH2698
iCloud: Use Lost Mode: http://support.apple.com/kb/PH2700